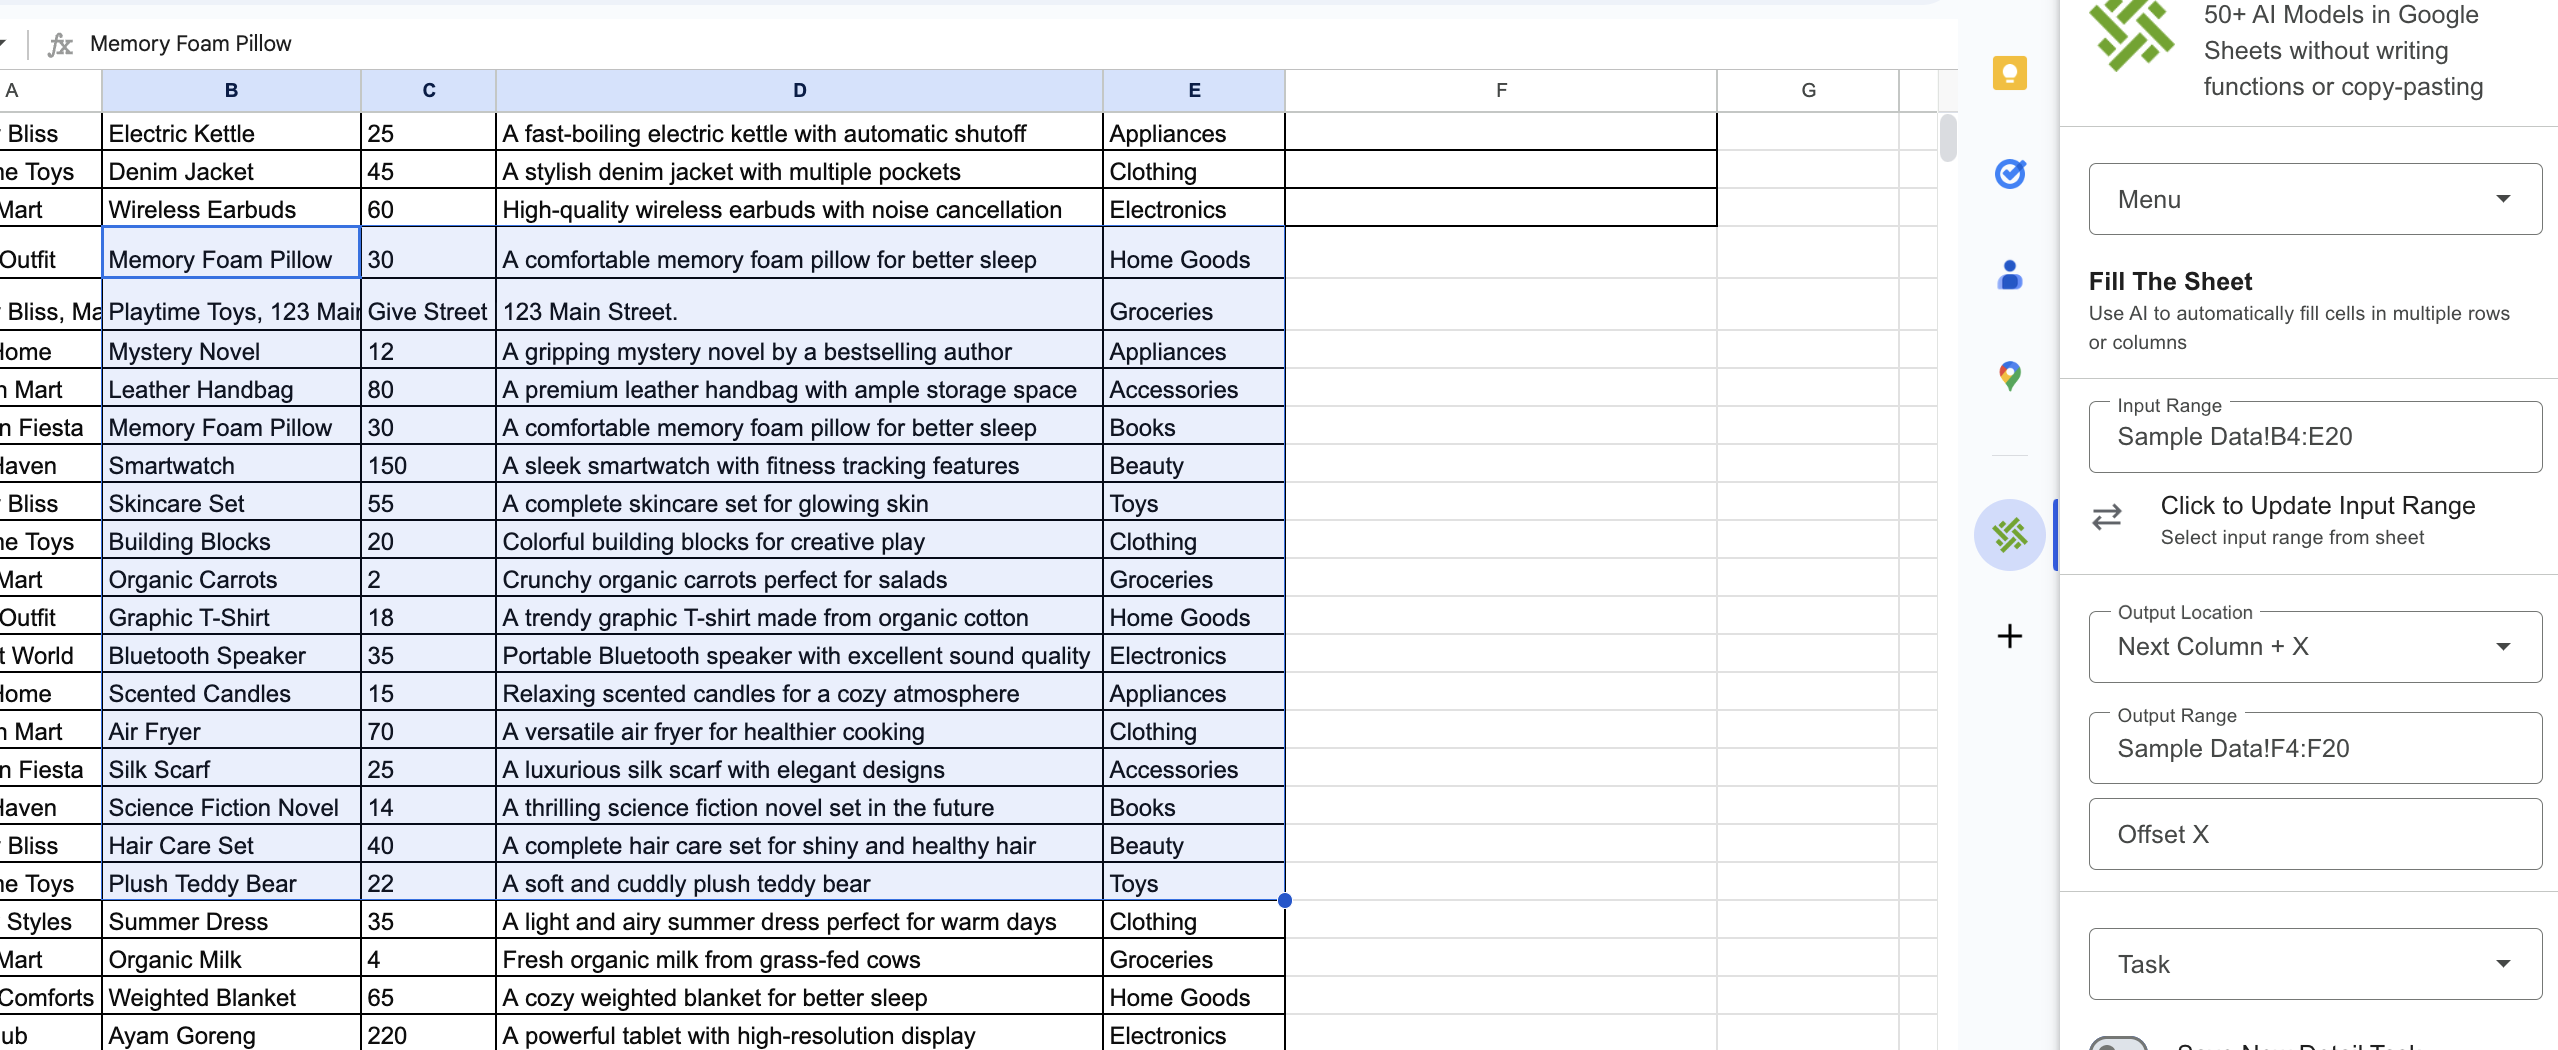
How to Select Input Range & Output Location?
Selecting Input Range
Selecting the input range is as easy as selecting a range of cells and then clicking the "Click to Update Input Range" button.
Important: Avoid writing the input range manually since it can easily lead to an error.
Note: Please note that we don't use all the data you select in the input range for the AI response. You need to define the data to use in the detail task field.
Selecting Output Location/ Range
It depends on whether you want to output in a single column or a single row:
Single Column: You process each row and write the output in a single column. Then, you need to choose Next Column, Next Column + X, or Custom Column.
Single Row: You process each column and write the output in a single row. Then, you need to choose Next Row, Next Row + X, or Custom Row.
Explanation of each option:
For Next Row: You will output the result in the next single row after the input range.
For Next Column: You will output the result in the next single column after the input range.
Next Row/Column + X: Instead of directly outputting after the input range, there is an additional X number after the next row/column.
Custom Row/Column: You need to write the output in another location. If you choose a custom row, you need to select a single row as the output range. If you choose a custom column, you need to select a single column as the output range. It does not support multiple columns/rows. The process of updating custom rows/columns is as easy as selecting a range of cells and then clicking the "Update" button.
Important: Avoid writing the output range manually since it can easily lead to an error.

